
How to tighten a bike chain (step-by-step)
19 August 2026

How you tighten a bike chain depends on the type of bike you have. On many single-speed and fixed-gear bikes, chain tension can be adjusted by moving the rear wheel slightly backwards. On bikes with a derailleur, however, the derailleur manages chain tension, so a loose chain usually needs diagnosing rather than simply tightening.
We've covered the basics for tightening a chain on a single-gear bike and on one with a derailleur. However, if you're unsure or not confident trying it yourself, a bike shop can usually assist.
What tools do you need to tighten a bike chain?
To tighten your bike chain, you’ll need the following:
- a bike stand
- a socket wrench
- an allen key
- bike chain lubricant
- an old rag or cloth
- some gloves to protect your hands
A quality bike repair kit should include most of the above; it’s good for cyclists to have to hand.
How to tighten a bike chain on a single-gear bike
Estimated time: 10–15 minutes
Difficulty: Beginner
Best for: Single-speed bikes, fixed-gear bikes and some children’s bikes
Main tools: Socket wrench or spanner, gloves and a bike stand if available
Single-gear or ‘single-speed’ bikes use one rear sprocket rather than a cassette of multiple gears. Depending on the bike, this may be fixed or freewheeling.
Your legs are essentially your gears on this kind of bike.
It’s pretty straightforward to tighten a chain on a single-gear bike, provided you take your time to get the tension right.

1. Place your bike in its stand
Turn the bike upside down by placing it in its stand. This allows easy access to the parts and makes the process much easier.
If you don’t have a bike stand, place it on a flat surface where it’s unlikely to get damaged—it’s a good idea to cushion the saddle with a mat.
2. Loosen the rear axle
Using the socket wrench, loosen the rear axle nuts just enough to allow the wheel to move within the dropouts. You shouldn’t normally need to remove them completely. Do so by twisting them anti-clockwise until they come loose.
3. Pull the rear wheel backwards
Gently move the rear wheel backwards in the dropouts until the chain has the correct amount of tension, keeping the wheel centred in the frame. Do this slowly and gently, as rushing the process could cause the chain to snap.
Keep checking the chain’s tightness as you pull on the tire and stop once the chain can only move around half an inch in either direction.
Try to keep the tire inside the bike’s wishbone to make reassembling the wheel easier.
4. Re-tighten the rear tire
Once you’re happy with the result and the chain has optimal tension, you need to fix the rear axle back into place.
With the socket wrench, carefully screw each of the nuts back into position using a clockwise motion until the tire is secured.
It shouldn’t touch the bike frame or chain—if it does, you need to loosen it up and try again.
5. Test your chain
Give the wheels a spin to check everything is in order. The chain and pedals should rotate easily, and the rear tire shouldn’t make any contact with the frame or chain as it spins.
Move the chain with your fingers, and ensure it only moves up or down around half an inch.
If there are any issues, you need to loosen and pull back the rear tire and repeat the process.
How to tighten a bike chain with a derailleur

On a bike with a rear derailleur, you don’t normally tighten the chain by moving the rear wheel backwards. The derailleur’s spring-loaded cage is designed to maintain chain tension as you move through the gears.
If the chain appears unusually loose, keeps coming off or skips while riding, check for common causes such as a worn or incorrectly sized chain, a damaged derailleur or poor gear adjustment.
You can also check that the derailleur cage moves freely and maintains tension on the chain. If the chain has recently been replaced, make sure it has been fitted at the correct length for your drivetrain.
If you’re unsure what’s causing the problem, it may be best to ask a bike mechanic to inspect the drivetrain.
FAQs
Understanding your bike can make maintenance much easier. You don’t have to know all the ins and outs, but just learning the basics behind how each component works can make all the difference.
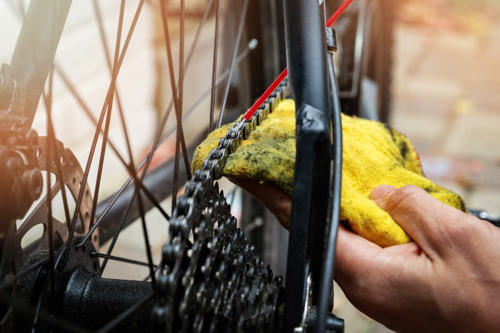
We’ve put together some FAQs to help you diagnose minor problems with your bike chain and take the necessary action.
1. How does a bike chain work?
This is a common question among those wishing to learn how to tighten a bike chain.
In short, a bike chain transfers power from the pedals to the drive-wheel, which propels your bike forward.
It’s made up of multiple wide and narrow links connected by rivets. Each outer link has a roller, which meets the chainrings and cassette on the drivetrain and allows the chain to move smoothly around it.
2. Why do bike chains become loose?
There are a few common reasons behind a chain becoming loose:
- general wear and tear
- placing a new chain on old components
- a weak derailleur spring
- the rear axle is positioned too far forward in the rear dropout
Sometimes it isn’t easy to spot a loosening chain when it’s in the early stages. If you’re unsure whether your chain is loose, here are some common symptoms:
- bike chain making contact with the frame
- bike chain dropping or skipping
- rapid drivetrain wear
- poor shifting
Knowing the causes and indicators of a loose bike chain will help you diagnose and fix the issue before it becomes more of a problem.
3. How tight should a bike chain be?
A bike chain should not be too loose or too tight. If it is too loose, it may slip, sag or come off while riding. If it is too tight, it can put extra strain on the drivetrain and make pedalling feel rough.
As a general guide, a single-speed bike chain should have a small amount of movement when pressed up and down. It should move slightly, but it should not hang down or feel completely rigid.
For bikes with gears, the derailleur should manage the chain tension. If the chain looks loose or keeps slipping, it may be a sign of wear, poor adjustment or a damaged component.
4. How often should I lubricate my bike chain?
To get the most out of your chain, it’s a good idea to lubricate it at least once every 100 miles or once per week if you’re riding on most days.
It’s an important step in your regular bike maintenance routine. If you ever don’t have time to properly clean and lube your chain, make sure you at least wipe it down with a clean rag.
5. How do I decide whether to replace or tighten my bike chain?
If your chain is loose because it’s rusted or worn, then you should replace it. This is especially true on bikes with derailleurs, as a worn chain can affect the lifespan of other components.
If it’s relatively new but has become worn, you may need to replace it this time before committing to regular bike maintenance to prevent this from happening in the future.
Chains wear down much quicker when they aren’t regularly cleaned and lubricated.
Got a loose chain that is new and well-maintained? Then simply tightening it should do the trick.
Specialist insurance by Cycleplan
Now you know how to tighten a bike chain, you can prevent unnecessary costs in fixing or replacing it. You may also want to help prevent this through specialist cycling insurance.
Please note the information provided on this page should not be taken as advice and has been written as a matter of opinion. For more on insurance cover and policy wording, see our homepage.