How to raise bike handlebars: Step-by-step
01 September 2025

Learning how to raise bike handlebars can make a world of difference to how well you ride and ensure that you don’t strain your back, wrists, or arms while you cycle. Whether you’re commuting on a hybrid bike or racing on a road bike, every kind of rider can benefit from having their handlebars at the right height.
Thankfully, adjusting your handlebar height is relatively simple, and this blog will take you through the process step by step. Before we go through how to raise a bicycle handlebar, though, we’ll first cover why it’s important to do so, and the main factors to consider when finding the right handlebar height for you.
6 reasons why you should adjust your handlebar height

There are several reasons why you may want to adjust the handlebar height of your bike. These include:
- More comfortable riding: The height of your handlebars in relation to your saddle directly affects the amount of pressure that you’re putting on your arms and wrists, and the alignment of your neck and back.
- Better control of your bike: The distance you have to reach to grip the handlebars has an impact on how much control you have over your steering.
- Improved performance: Adjusting your handlebars can have a knock-on effect on your aerodynamics, endurance, breathing, and pedalling power.
- Preventing injury: Over time, having your handlebars at the incorrect height can cause pinched nerves, muscle strain, or overuse injuries.
- Increased visibility: If you choose to raise your handlebars, this can give you better visibility in a more upright position, helping you to spot oncoming traffic.
- Adapting to different riding styles: How high you have your handlebars partly depends on your riding style. The benefit of knowing how to raise them means you can adjust this in between rides.
What to consider before adjusting handlebar height

Before you begin adjusting your handlebars, there are three factors to consider which will help you find the right height for you.
Your height and proportions
Arguably, the most important factor that will impact the height at which you should have your handlebars is your overall height and the length of your torso and arms.
Taller riders usually need a greater saddle-to-bar drop (the distance between the height of the saddle and handlebars); however, riders with a longer torso and arms will be able to reach lower handlebars more comfortably. It’s a good idea to test out different heights to find the most comfortable setup for you.
Riding style and purpose
The second factor that will impact the ideal height for your handlebars is your preferred riding style and what you plan to do with your bike.
If you’re commuting or cycling for fun, you’ll likely benefit more from having higher handlebars that provide a more comfortable riding posture.
If you’re planning to race or want to improve your performance, you’ll want to have your handlebars either level or below the height of your saddle, which makes you more aerodynamic.
Flexibility and fitness
Lastly, your flexibility and fitness may affect the best handlebar-to-saddle height ratio, regardless of your height. This is because having lower handlebars with limited movement in your back or hips could cause an injury. Practising some core exercises for cyclists can help improve your overall strength, but in the meantime, it’s best to choose higher handlebars if you find these muscles are tight when riding.
How to raise bike handles in 5 steps
Learning how to raise bike handlebars is relatively simple and can be completed in five simple steps. To complete these steps, you’ll need an Allen key, a tape measure, and some grease if you’re having trouble adjusting the height.
1. Check you’re not already at the maximum height
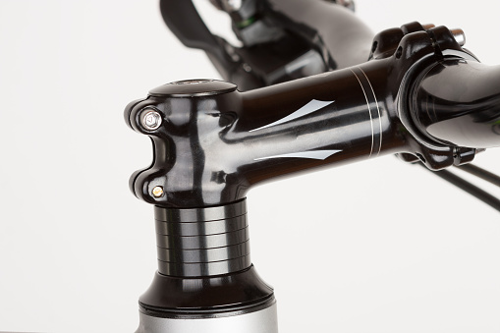
First and foremost, check you’re not already at the maximum height that your spacers will allow. Spacers are the rings you’ll find stacked on your steerer tube, which can be moved above or below the stem to either raise or lower the height of your handlebars. If all the rings are stacked underneath, you may need to buy a new stem that has more rise available.
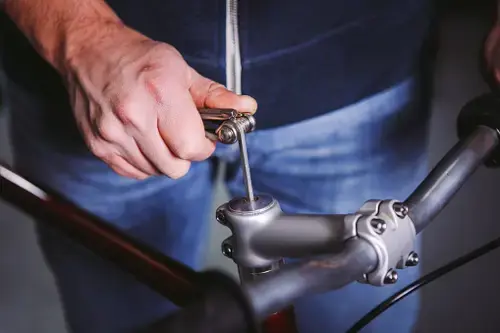
2. Undo the top cap and stem bolts
The key thing to remember here is you want to loosen the top cap and stem bolts but not completely remove them. The top cap is at the top of the steerer tube (hence the name), and the stem bolts are the two bolts holding the stem onto the steerer tube.
3. Rearrange the spacers until the handlebars are at the desired height
As we’re raising the handlebars, you’ll want to remove the stem and stack the spacers below it.
4. Check the alignment and tighten the bolts back up
Place the stem back on the steering tube, but before you tighten it, make sure it’s aligned correctly with your front wheel. Then, tighten the bolts back up. If you notice it’s still not entirely straight, you may need to true your bike wheel.
5. Test the height of the handlebars
Lastly, test out the height of the handlebars and adjust again if needed.
How to raise a bicycle handlebar: FAQs
Should the saddle be higher than the handlebars?
The saddle of the bike can be higher than your handlebars, but whether you want that depends on if you’re using your bike to race, your flexibility, and the type of bike you’re using. If you’re using a road bike and plan to race, then you may want your saddle level or above your handlebars, but if you’re using your bike for leisure, you’ll likely prefer your saddle to be below your handlebars.
How do you know if your handlebars are too low?
If you experience pain in your lower back, arms, neck, or shoulders, then your handlebars are likely too low. Another sign can include difficulty breathing due to the compression on your diaphragm.
Specialist cycling insurance through Cycleplan
No matter how much you fine-tune your bike, going out for a ride can still pose a risk of injury or injuring someone else. That’s why you may want to consider getting specialist cycling insurance.
Find out more about specialist cycling insurance through Cycleplan or get a quick online quote today.
Please note the information provided on this page should not be taken as advice and has been written as a matter of opinion. For more on insurance cover and policy wording, see our homepage.